Run your first repair in BenchKey
Prepare your shop, practice with sample records and work through a repair. These guides cover access, approval, payment, staff, texting, first-week checks and help. You can finish other settings after your first ticket.
Public registration is paused. Join the waitlist for updates, or sign in if your shop already has beta access.
Have your shop details ready
Gather what applies to your shop. You can add most details later, and email works before you connect your own address.
Access to your shop
Waiting for access
Public registration is paused. Join the waitlist for access updates. Joining does not guarantee a beta invitation.
Join the waitlistAlready invited
Invited shops and staff can sign in at app.benchkey.com. Staff must use the exact email address the owner invited. Ask for a new invitation if yours expires.
Sign in
What to have ready
- A computer for guided practice lessons. Tutorials are unavailable on phones and tablets.
- Your shop name, address, phone and email for receipts, customer emails and the status page.
- Stripe or Square for cards in BenchKey. Cash and your own card machine work without connecting a processor.
- US texting: Quo, Twilio or RingCentral, legal business name, address, EIN and website privacy policy. Quo and Twilio support sole proprietor registration.
- Staff email addresses for individual logins. Standard includes one person, Pro up to 8, Business unlimited people.
- Existing records, if you're bringing them over. Review the import preview before you run it.
Work through your first repair
Follow the guides in the order your shop needs. Start a ticket before finishing every setting, then return to the next task.
-
Join your shop's workspace
Join the waitlist if your shop is waiting for access. Invited beta shops can sign in, and staff join through an owner's invitation. Use the email address on the invitation.
Signing in- Join the waitlist while public registration is paused.
- Invited beta shops sign in at app.benchkey.com.
- Staff must use the exact email address the owner invited.
-
Set up the details customers see
Add your business profile, repair categories, statuses and message templates. The Getting started hub shows which setup areas are ready. Ask the assistant to change settings you have permission to manage.
Set up your shop- Your business details appear on receipts, the status page and emails.
- Review the customer messages attached to each status.
- Ask the assistant for help, or choose Do it for me.
-
Practice before your first real ticket
On a computer, open a lesson to practice with sample records in a separate workspace. Practice work does not reach customers or your real books. Lessons about settings use your shop's real settings and say so.
Practice mode guide- Practice records stay separate, with no messages delivered to customers.
- Settings lessons change your real settings and tell you beforehand.
- Use a computer. Tutorials are unavailable on phones and tablets.
Tutorials require a computer, and settings lessons change real settings. A practice workspace closes after inactivity.
-
Check in the device
Choose New Ticket, enter the customer, device and reported issue, then review and save. The repair gets its own ticket number. Find it again in All tickets by customer name or ticket number.
Set up your first repair- Choose New Ticket in All tickets or New in the sidebar.
- Confirm the customer's phone and email before saving.
- Search by customer name, ticket number, phone or device.
-
Agree on the work before invoicing
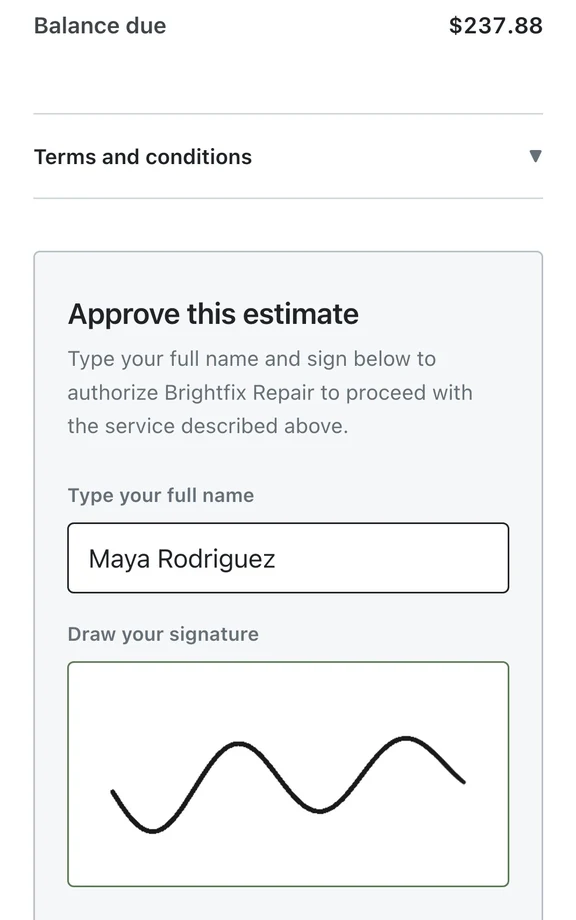
Send the estimate from the ticket. Customers can approve through their link. Staff with permission can record approval received another way. Staff approval does not create a customer signature.
Estimates and approvals- Add parts and labor, review the total, then send the estimate.
- Customers enter their name and signature through the estimate link.
- When the customer's approval arrives, check the approved estimate and choose Convert to invoice.
-
Collect payment against the invoice
Open Record payment on the invoice to collect the balance. Check the saved payment, remaining balance and invoice status. Automatic receipts depend on enabled channels and valid contact details. Customers can also pay through the status page.
Invoices and payments- Counter cards need Stripe or Square and a compatible reader.
- Send a payment link so customers can pay from their phone.
- Record cash with an open register drawer; check change and status.
-
Give staff their own logins
Choose Invite member, enter their email and assign a role. Review access to payments, reports and settings before they begin. The Give your tech a login lesson walks through inviting staff.
Team and roles- Review owner, admin, technician, viewer and custom role permissions.
- Invitations expire. Ask the owner to resend an expired invitation.
- Standard includes one person, Pro up to 8 and Business unlimited people.
-
Start US texting registration early
Register your US local texting number with your provider when you connect texting. Texting from your shop's number is included on Pro and Business. While approval is pending, use email updates, the customer status page or Text from your phone.
US texting registration- Register with your provider: Quo, Twilio or RingCentral.
- Customers can get email updates and use the status page.
- Text from your phone is available on every plan.
Carrier registration can take days or weeks. Your provider and carriers determine the timing. Start when you connect texting.
-
Check the work as tickets move
Review Ready for business in the Getting started hub, then adjust settings as you handle repairs. Learn where to correct a status, resend a receipt and review a refund's outcome.
Common tasks and answers- Check each status's automatic messages before using it with real customers.
- Change an incorrect status from its chip. Messages may send again.
- Adjust your settings based on the repairs your shop actually handles.
-
Find help while you work
Open Help for questions, bug reports and ideas. Chat answers from the help pages and links its sources. AI answers can be wrong. Choose Talk to a person to ask someone at BenchKey to check.
Help, bugs and ideas- Chat links the help page used for its answer.
- Choose Talk to a person whenever you need human help.
- Attach a screenshot to a bug report and follow its status.
Questions before your first ticket
Do I need to finish every setting before creating a ticket?
No. Start with a repair so you can learn the ticket and queue together. Adjust settings as your shop handles real work. Before changing a status on a real customer's ticket, check which messages it sends.
Can I use practice tutorials on my phone?
Practice tutorials require a computer and are unavailable on phones or tablets. On a phone, the Getting started hub shows the first-repair steps with short demos instead.
Does practice send messages to customers or affect my books?
Practice lessons use a separate workspace with sample records. Actions there do not reach customers or your real books. Settings lessons are different: they change your shop's real settings and tell you that before you begin.
How long does US texting registration take?
Approval can take days or weeks. Your provider and the carriers set the timing, so there is no promised start date. Use email updates, the customer status page or Text from your phone while you wait.
Can my staff learn without a training call?
Yes. On Pro or Business, invite each person with a role that fits their work. Use the Give your tech a login lesson to learn the invitation steps. The guides and Help chat cover daily tasks, and Talk to a person lets you ask for human help.
What should I check if a button is missing?
Confirm you're in the right shop and location, then ask the owner to check your role permissions. Some features require a different plan. The Getting started hub labels lessons with the plan they need.
The waitlist is open for repair shops
Leave your email for access updates. Your name and shop name are optional.
 Watch the product tour 3:34 Follow a repair from check-in to pickup in BenchKey