

Integrations
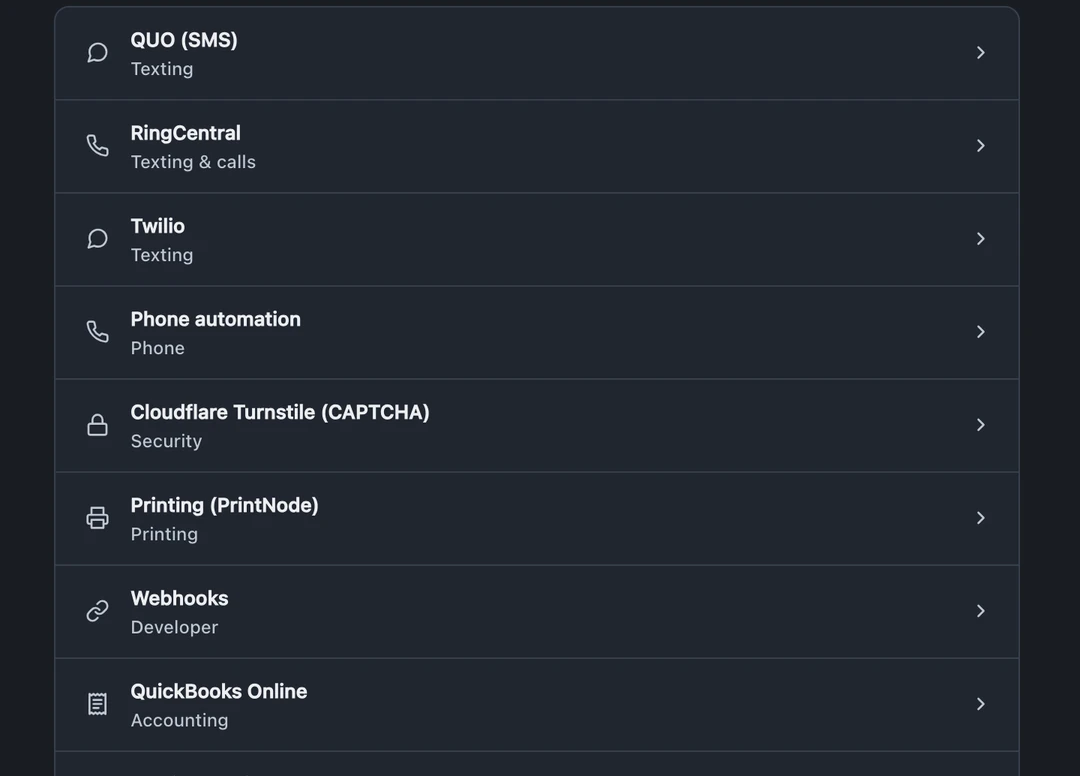
Most integrations live in Settings → Integrations & Shipping → Integrations. Two groups live elsewhere: card payments (Stripe, Square) and Affirm are in Settings → Billing & Payments → Payments, under Payment providers, and shipping labels are in Settings → Integrations & Shipping → Shipping. Most integration pages have Setup help with what you need before you start.
See where to connect Stripe or Square and how to record a cash sale without connecting either account. (54 s)
Find where to register your texting number and see how BenchKey handles texts while you wait. (1 min 15 s)
What each plan includes
Section titled “What each plan includes”| Integration | Plans |
|---|---|
| Stripe, Square and Affirm | Every plan |
| Shop texting (Quo, Twilio, RingCentral); call records with Quo and incoming-call pop-ups with RingCentral | Pro and Business |
| QuickBooks Online | Pro and Business |
| MobileSentrix | Unavailable |
| BenchKey Printing | Pro and Business, where available |
| DYMO labels | Pro and Business |
| Shippo and UPS shipping labels | Business |
On Standard, texts go from your own phone with the message written for you. A trial provides Business plan access, subject to workspace enablement, provider setup and beta exclusions. See trial access.
Quo, phone & texting (recommended)
Section titled “Quo, phone & texting (recommended)”Quo (formerly OpenPhone; BenchKey shows it as QUO) gives the whole team business calls and texting on one shared number. Texts, calls, voicemails and call transcripts land on the right ticket; transcripts need Quo Business or Scale with call recording on. It is what we run at our own store.
- Open Settings → Integrations & Shipping → Integrations and choose QUO (SMS).
- In Sending phone number, enter the Quo number your shop texts from, in international format (like +12025550123).
- Paste a Quo admin’s API key into QUO connection key and save. BenchKey sets up incoming messages for you.
- On the bar at the top of the integrations page (it says No texting provider is set up yet. until a provider is saved), choose Change and make sure Provider shows QUO.
- For texts to US numbers, finish Quo’s carrier registration before you rely on texting. See Texting customers in the US (10DLC).
Quo supplies US and Canadian numbers. For an Australian sending number, see the Twilio steps below.
Card readers
Section titled “Card readers”BenchKey works with Square Terminal and Stripe smart readers, such as the S700 or WisePOS E. Stripe Bluetooth readers are not supported. Readers from Shopify, Clover, Toast and other companies do not work with BenchKey. Shopify’s readers only work inside Shopify’s own POS app.
Availability depends on your Business Profile country and currency, not your BenchKey billing country. With the shop’s local currency:
- Square: United States, Canada, United Kingdom, Ireland, Australia, France and Spain.
- Stripe: United States, Canada, United Kingdom, Australia, New Zealand, the euro area, Switzerland, Denmark, Sweden, Norway, Poland and Czechia.
Mexico, Romania and Liechtenstein have Stripe online payments only, without readers.
Connect and pair readers in Settings → Billing & Payments → Payments → Payment providers. Connecting a payment provider requires the owner or someone the owner has given permission.
- Square: connect using the steps below. Under Terminal readers by BenchKey location, choose Create 5-minute Device Code and enter it on the Terminal’s sign-in screen. Press Refresh, then select the reader for your BenchKey location.
- Stripe: connect using the steps below. Connect the reader to Wi-Fi, then enter its pairing code in the Stripe Dashboard under Terminal → Readers → Register reader. Back in Terminal readers by BenchKey location, press Refresh and select the reader for your BenchKey location.
Stripe, payments
Section titled “Stripe, payments”- Open Settings → Billing & Payments → Payments and choose Connect Stripe. The owner (or whoever runs the shop’s Stripe account) signs in to Stripe; there are no keys to copy.
- Back in BenchKey, check the account and Account type: Live payments takes real money, Testing doesn’t.
- Under Payment provider, choose Stripe (Use Stripe for payments).
- To review the card-link flow, open an unpaid invoice in the ticket’s Money panel and choose Record payment → Pay with Stripe (card link). Review the amount before creating a link or taking payment.
Customers pay by secure checkout link, in the customer portal, or at the counter on a Stripe Terminal reader (such as the S700). Invoices mark themselves paid when the money lands, and refunds reconcile back onto the ticket. Resolve any warning shown on the Stripe card before taking real payments.
Square, payments
Section titled “Square, payments”- In Settings → Billing & Payments → Payments, choose Connect Square and sign in to the shop’s Square account.
- After it says Connected, check the merchant, the Square location and the Account type. Testing can’t take real payments.
- Under Payment provider, choose Square.
Square takes card payments at the counter, by link and in the portal, and flags any payment that doesn’t match its ticket. Resolve any warning on the card before taking payments. Advanced, custom Square connection is for special setups; most shops never need it.
Affirm, financing
Section titled “Affirm, financing”Affirm offers customers monthly payments on large invoices. It’s for businesses in the US and Canada.
- In Settings → Billing & Payments → Payments, open Affirm Integration and save both Affirm keys with Affirm switched off.
- Choose Test connection. If it passes, switch on Enable Affirm Payments and save.
A Pay with Affirm button then appears on unpaid invoice pages when the balance due is $35 or more. Below that, the page says Affirm is available on orders of $35.00 or more.
RingCentral, texting & calls
Section titled “RingCentral, texting & calls”- In Settings → Integrations & Shipping → Integrations, open RingCentral and choose Connect RingCentral.
- Sign in to the shop’s RingCentral account and approve access.
- Back in BenchKey, check RingCentral account and Message routing. If routing says Needs setup, choose Refresh message routing.
- Pick RingCentral on the Texts send through bar.
Customer texts send and receive on your RingCentral number and thread onto the right ticket; incoming calls pop the customer with their open tickets. For texts to US numbers, follow the US registration steps. For other countries, confirm SMS availability and the required account and number checks with RingCentral; a connected phone account alone does not prove the number can text those customers.
Twilio, SMS
Section titled “Twilio, SMS”Twilio handles texting only (no calls).
- From the Twilio Console dashboard, copy the Account SID (it starts with AC) and the Auth Token. You need an upgraded Twilio account with an SMS-capable number.
- In Settings → Integrations & Shipping → Integrations → Twilio, paste them, enter your Twilio number in international format, and choose Connect Twilio. BenchKey checks the number and sets up incoming messages for you.
- Pick Twilio on the Texts send through bar.
Complete the checks Twilio requires for your account, sending number and customer destinations before relying on customer texting:
- US numbers: US A2P 10DLC registration applies when texting US numbers from a US local number. Toll-free numbers have a separate provider verification process.
- Australia: complete Twilio’s identity and business checks and obtain or port an SMS-capable number through Twilio. Australian local numbers require an Australian street address, not a PO box. For mobile numbers, individual registrations also require an Australian street address; Twilio currently allows a business registration to use an overseas address. Provide the identity, business and address documents Twilio requests, then connect the number in BenchKey. BenchKey uses a numeric sending number, such as a +61 number, rather than a brand-name sender ID.
- Other countries: follow Twilio’s country guidelines for the number you use and the countries you text, including any identity, business, address or number-registration checks.
Test connection on the Twilio card checks the connection and number setup. After Twilio approves the required checks, send a test update to your own mobile and confirm it arrives before relying on customer texts.
BenchKey Printing
Section titled “BenchKey Printing”BenchKey Printing is part of Pro and Business. Open Printing (PrintNode) in the integration directory and follow the printing setup guide for the option your settings show: the standard PrintNode app, the BenchKey Print Connector, or an existing legacy connection. Choose printers for documents, receipts and labels. Printing receipts, invoices and tickets from the browser works on every plan without any setup.
Signed webhooks
Section titled “Signed webhooks”Open Webhooks from the integration directory to connect a custom dashboard, bookkeeping bridge, or automation. Give the endpoint a URL and description, then subscribe only to the events it needs. Every request carries a BenchKey-Signature HMAC header; failed deliveries retry with backoff. The endpoint screen also lets an admin inspect deliveries, pause the feed, or rotate its secret.
QuickBooks Online, accounting
Section titled “QuickBooks Online, accounting”- Open QuickBooks Online in the integration directory and choose Connect to QuickBooks.
- Sign in to QuickBooks Online and choose the company, then approve access. BenchKey tries to set up the sales and tax mappings for you.
- Check Setup and sync preferences, including Default QuickBooks item (required).
Automatic posting turns on after successful initial setup. Review mappings and the saved preference; reconnecting preserves your choice. For manual sending, turn it off and use Sync to QuickBooks in the QuickBooks Online card. Anything edited after it synced waits in Needs review instead of posting twice. Full guide: QuickBooks Online sync.
For help with a previous accounting connection, contact support.
DYMO, labels
Section titled “DYMO, labels”DYMO labels are part of Pro and Business. Choose your label size in Settings → Documents & Labels → Printed Labels. Print device labels from the ticket, sized for your DYMO rolls, and check the preview before printing.
Shippo, shipping labels
Section titled “Shippo, shipping labels”Shipping labels are part of Business and live in Settings → Integrations & Shipping → Shipping.
- In Shippo, create a live API key (API Configuration → Developer keys), add a payment method under Shippo billing, and switch on the carriers you use.
- Paste the key into the Shippo card in BenchKey and save, then sync your carrier accounts.
Buy and print labels right from the ticket through Shippo or Direct UPS; tracking numbers attach automatically. From a mail-in lead, Generate shipping label uses Direct UPS for US shops. Most shops should use Shippo for ticket labels.
MobileSentrix, parts-order tracking
Section titled “MobileSentrix, parts-order tracking”The MobileSentrix parts tracking card in Settings shows Unavailable: “MobileSentrix order tracking isn’t available for your shop yet. We’re waiting on MobileSentrix to approve connections for more shops.”
Only BenchKey’s own shop can currently connect. Choosing Pro or Business does not make this integration available.
Coming soon
Section titled “Coming soon”- Phone LCD Parts, parts ordering from your supplier
A sane setup order
Section titled “A sane setup order”- Stripe or Square: money first. Cash and your own card machine work from day one.
- Texting (Pro and Business): connect a provider that supports your sending number and customer destinations. Follow US registration for texts to US numbers, or the provider checks above for Australia and other countries.
- Printing (labels on Pro and Business): labels from day one keep the bench sorted.
- QuickBooks Online (Pro and Business): stop re-keying sales once money is flowing.
- Affirm: when big-ticket work needs financing.