Multi-location setup
Multi-location keeps every store in one account: one customer base, one login per person, with each counter seeing its own work. Available on plans that include the multi-location feature, see pricing.
Three locations on file, and the header switcher flipping the workspace between them. Recorded from the real app with demo data.
Add a location
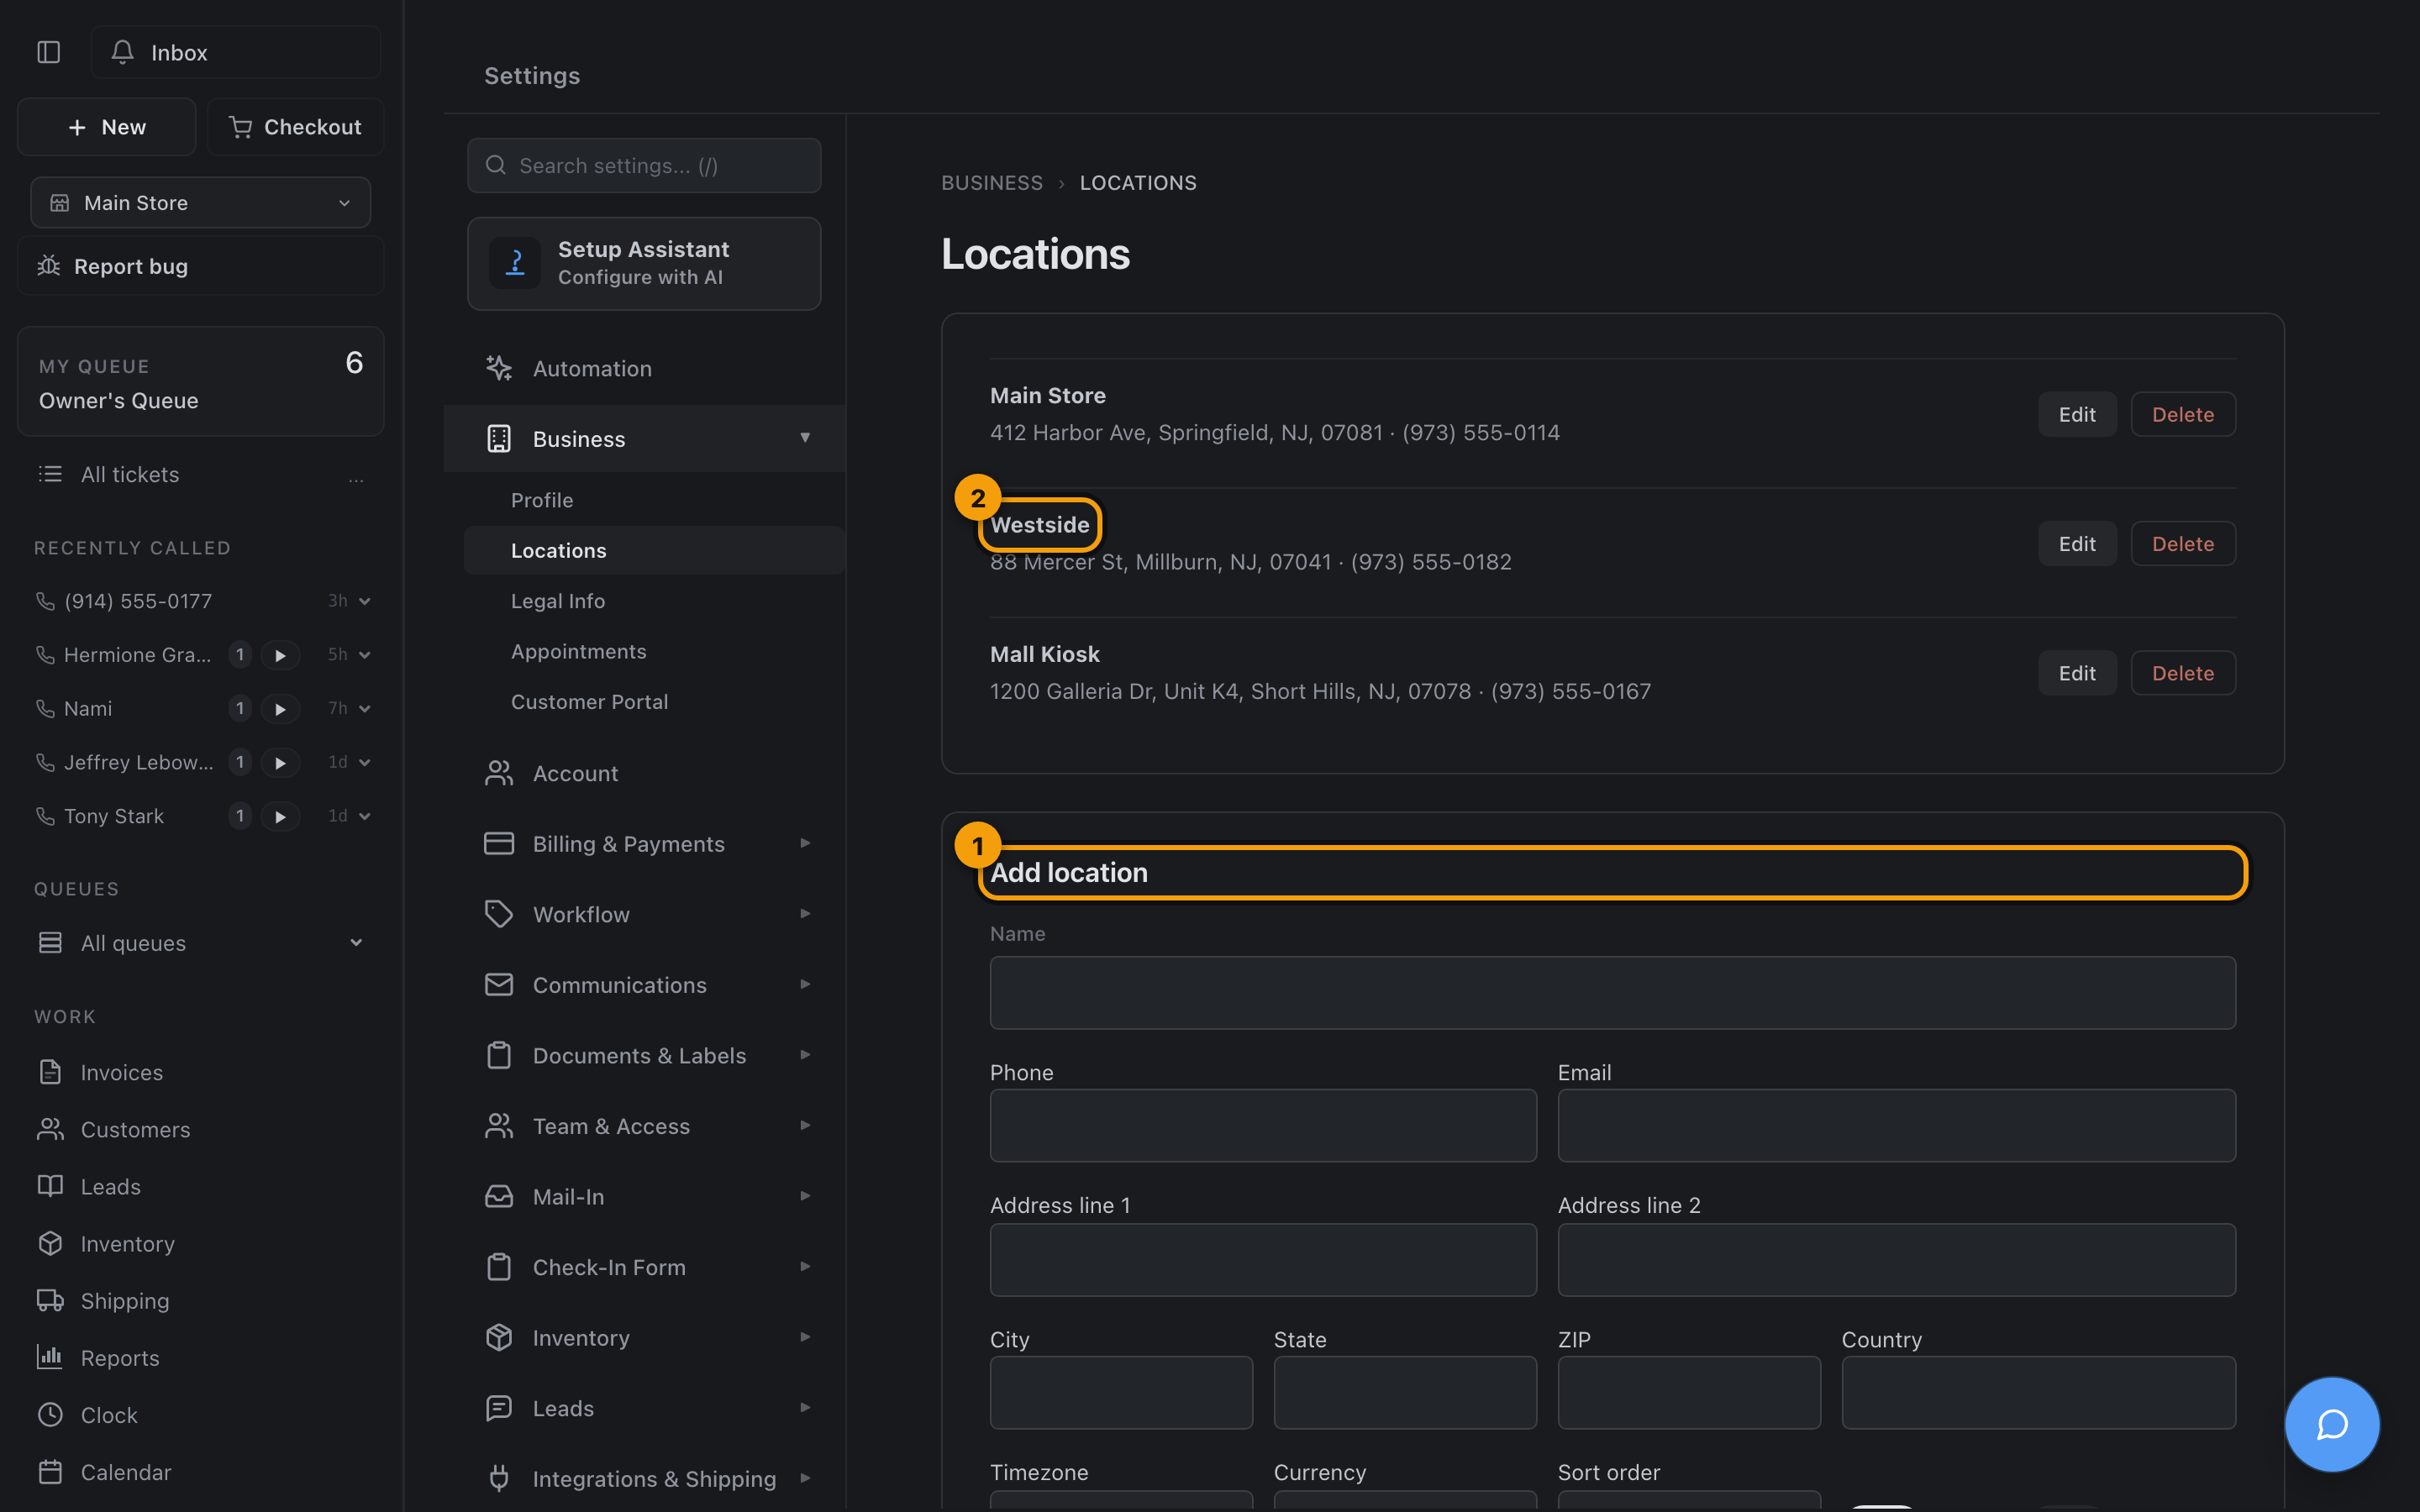
Section titled “Add a location”- Open Settings → Business → Locations and click Add location (marked 1).
- Give it a name, address, and phone (marked 2 shows a second store). The address feeds receipts and customer-facing pages for that location.
- Assign printers: each location points at its own label and receipt printers through PrintNode, so check-ins print where the device actually is. See Printing setup.
What is shared, what stays local
Section titled “What is shared, what stays local”Shared across every location:
- Customers and their full history, a customer who dropped off downtown can pick up uptown
- Your settings, templates, statuses, and automations
- Staff accounts and roles
- Owner-level reporting
Local to each location:
- The queue and intake
- Inventory stock counts, the same part number tracks separate on-hand per store
- Printers and the cash register
Working across locations
Section titled “Working across locations”- The location switcher in the sidebar moves you between stores; staff see what is theirs, owners can see across.
- Inventory shows per-location stock so the counter can answer “the Westside store has two” without a phone call.
- Reports filter per location or roll up to the whole business.
Pricing note
Section titled “Pricing note”Additional locations are an add-on to plans that support them. Billing counts active locations automatically, no manual reconciliation.