

Creating tickets
Every repair in BenchKey is a ticket. Work can enter through the counter, an appointment, a mail-in form, or a converted lead. You can also create a ticket manually.
The ticket is also where you prepare the estimate, record approval, create the invoice, apply previous payments, and collect the balance.
Create a repair ticket, choose its status and queue, explore the ticket panels, and find the repair again. (1 min 33 s)
Find and open a ticket
Section titled “Find and open a ticket”Choose All tickets in the left icon rail, or Search tickets in the top bar. Search by customer, ticket number, phone, email, or device, then select the matching repair. It opens as a page with its own tab in the top bar. On a phone, choose Tickets in the bottom navigation, then tap the repair.
The name search returns both an iPad and an iPhone repair, and the iPad ticket opens with its conversation. This recording uses fictional shop data in the real app.
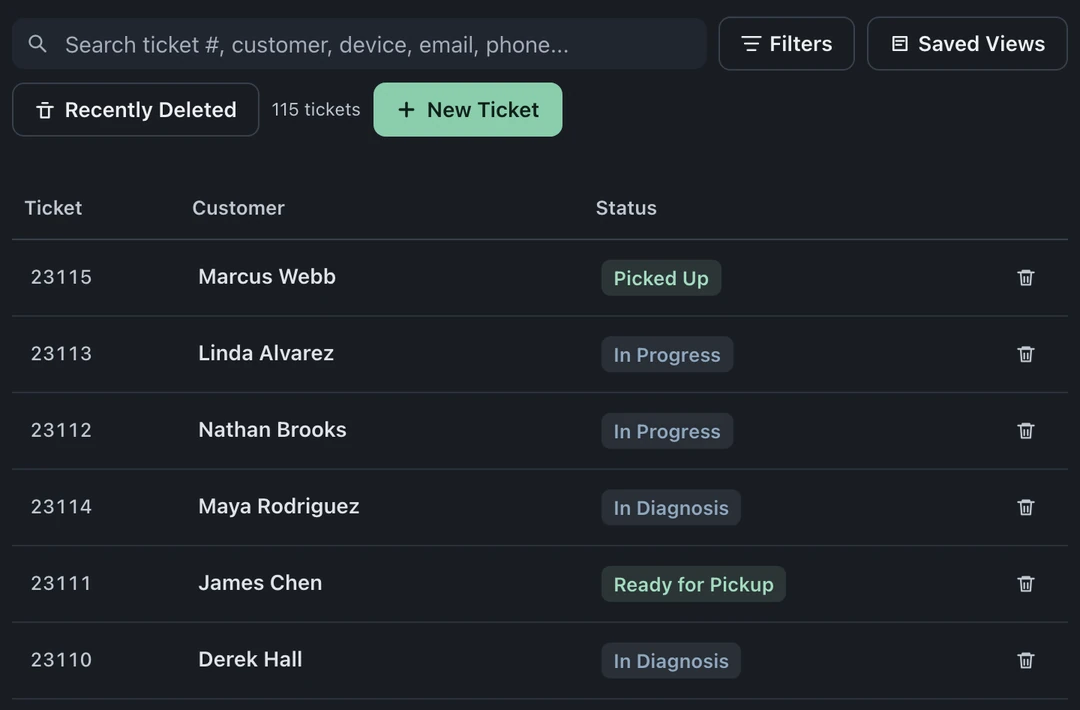
What you should see: the customer name, ticket number, phone, and email in the header. Open the Device panel using its icon at the right edge to check the device. Check these before adding notes, sending a message, or creating a document.
The four intake paths
Section titled “The four intake paths”- Walk-in check-in, staff collect contact info, device, and problem, then create the customer and ticket in one pass. The customer-facing kiosk displays the existing ticket for agreement and condition review and a signature. See Check-in & kiosk.
- Appointment, an online booking (Pro and Business) converts to a ticket at drop-off, carrying the customer and device details from the booking.
- Mail-in form (Business), the public intake form on your website creates the ticket before the package arrives.
- Lead conversion (Pro and Business): open the lead and choose Actions → Convert to ticket. Check the prefilled details; Name and Issue or service are required. Then choose Create ticket. The lead’s conversation stays with the new ticket.
You can also create a ticket manually with New Ticket in All tickets or Create new → New ticket from the + icon in the left rail.
What a ticket carries
Section titled “What a ticket carries”- Customer, matched by phone/email so returning customers keep one record and one history
- Device, what’s on the bench, with serial/identifiers as your intake form defines
- Status, where the job is in your workflow; drives the portal timeline and automations
- Queue and Due date, fields in the Ticket panel for the bench handling the work and the promised date
- Internal notes, for your team only; the customer never sees them
- Photos and files, internal unless you choose to send them. Add them under Attachments in Files and shipping. When the ticket has a customer email, choose Yes, email them or No, internal only as you attach a file. Without a customer email, files stay internal.
- Messages, the email/SMS thread for this repair
- Money, estimates, approvals, invoices, discounts, and payments for this job
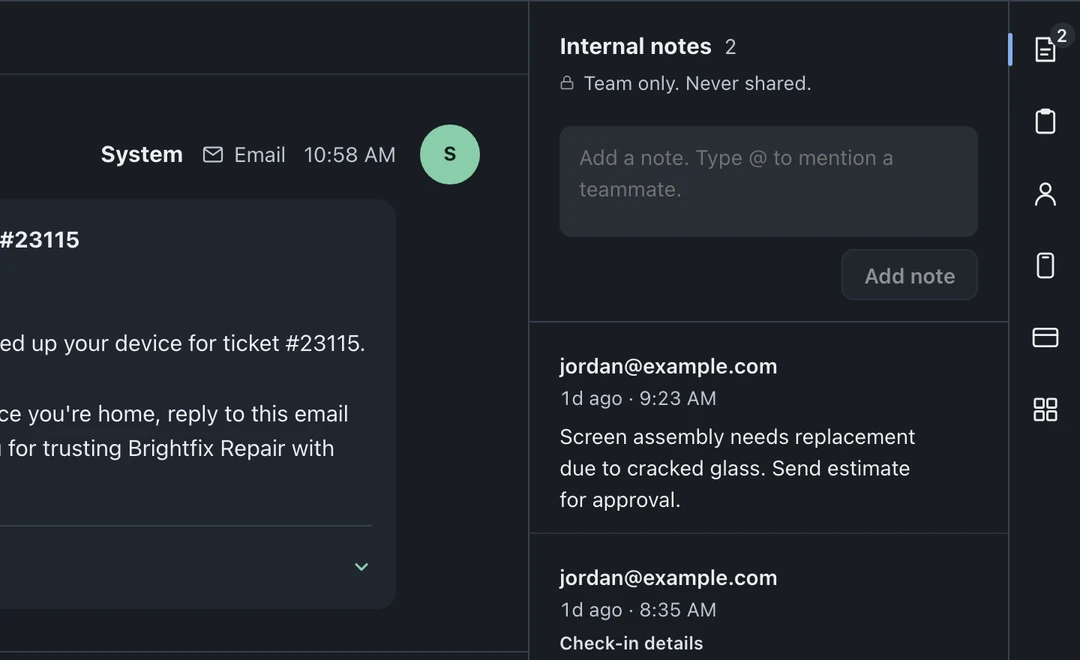
Handle billing inside the ticket
Section titled “Handle billing inside the ticket”Owners and admins: open the Money panel using its icon at the right edge, then choose New estimate or New invoice. Saved documents appear under Estimates and Invoices in that panel, with a count beside each heading.
From there you can:
- Build line items and add a discount.
- Review approval and convert an estimate into an invoice. Staff approval on the customer’s behalf is identified separately from customer electronic approval.
- Apply an eligible previous payment already recorded in BenchKey.
- Collect the remaining balance and check the saved payment on the ticket.
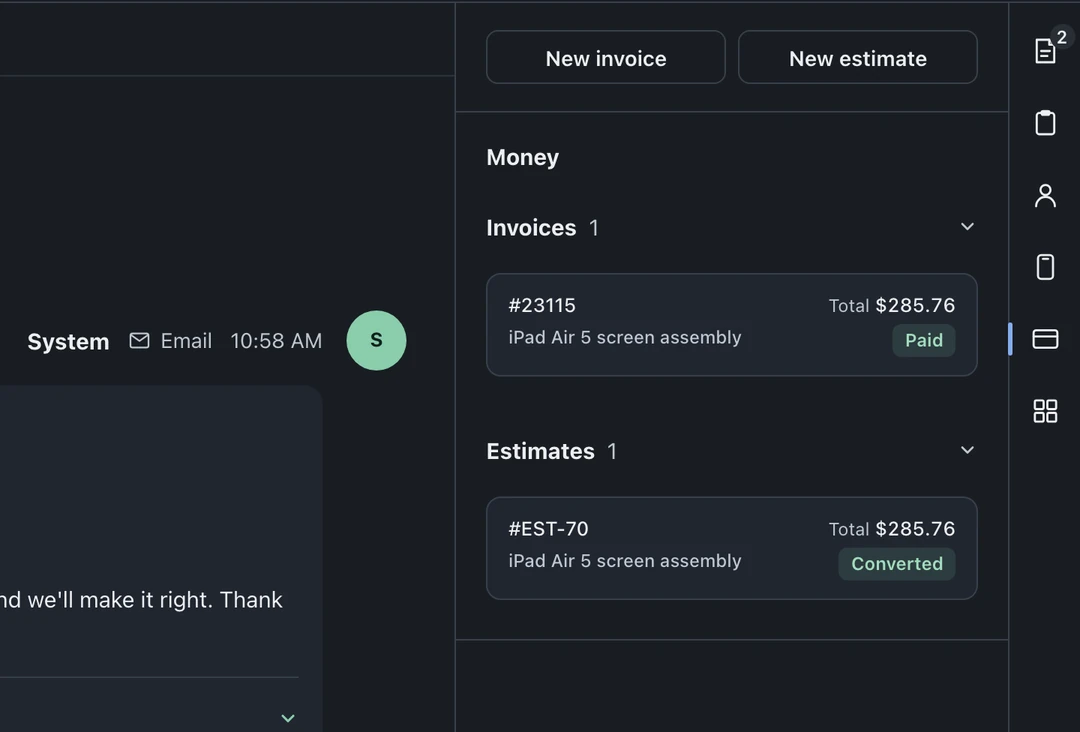
Follow the guides for estimates and approval, discounts, previous payments and new invoices.
Customer deduplication
Section titled “Customer deduplication”Intake checks phone and email for existing customers. Confirm the matching customer when prompted to attach the ticket to their existing record.
Labels
Section titled “Labels”On Pro and Business, choose ⋮ Ticket actions → Print Label on the ticket to print or reprint its device label. A separate printing setting offers a drop-off receipt prompt after check-in.