

Condition checklists & photo evidence
Condition checklists give the counter a repeatable pre-repair inspection. Each observation is recorded as OK, Damaged, or N/A for every device on the ticket, before the first screw turns.
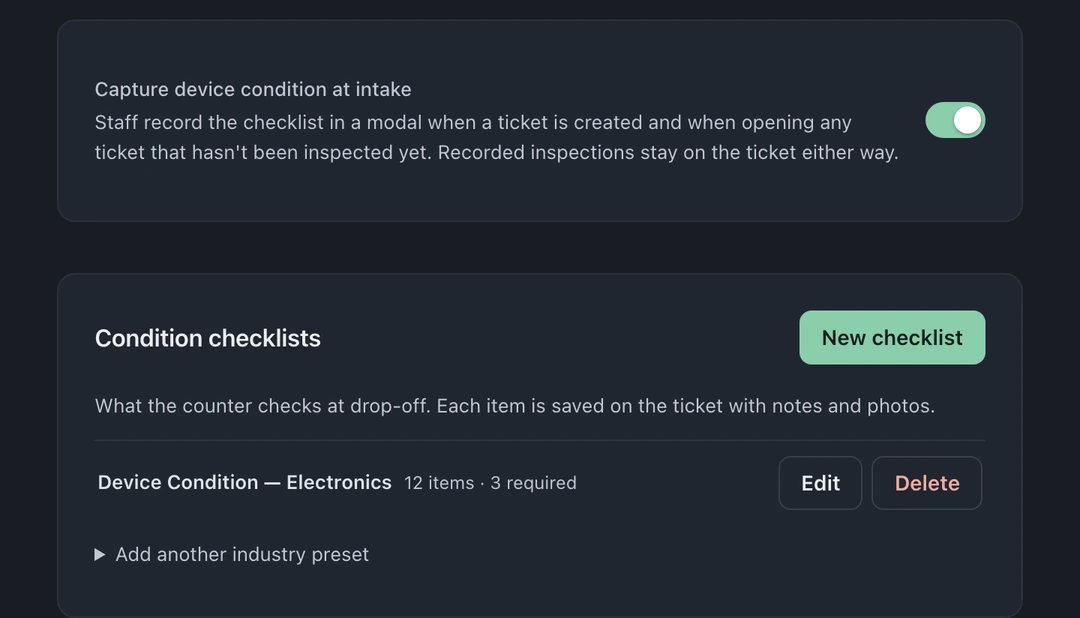
This shows the saved checklist’s configuration. Recording a device inspection is a separate step.
Turn condition capture on
Section titled “Turn condition capture on”Condition capture is off by default. An owner or admin can configure it without changing the ordinary check-in form:
- Open Settings → Check-In Form → Condition Checklists.
- Turn on Capture device condition at intake.
- Apply an industry preset or choose New checklist.
- Edit the name and rows, then choose which rows are required and which may accept a photo.
Ten starting presets cover electronics, data recovery, automotive, appliances, jewelry and watches, tailoring, computers and IT, cameras and optics, musical instruments, and general service. Every preset becomes an ordinary editable checklist after you apply it.
Record an inspection
Section titled “Record an inspection”BenchKey presents the checklist after a ticket is created and when staff open an uninspected ticket. On a multi-device drop-off, each device gets its own named section and complete set of answers.
For each row:
- Choose OK, Damaged, or N/A.
- If the item is damaged, describe what staff saw at intake.
- Attach a photo when that row allows photo evidence.
- Complete every row marked with an asterisk. Save inspection stays unavailable until all required answers are present across every device.
Optional observations can still be answered so the record is complete. The progress footer shows how many required answers are done before staff save.
Read and update the ticket record
Section titled “Read and update the ticket record”After saving, open the ticket’s Device panel using its icon at the right edge. The checklist summary below the device details shows:
- Totals for OK, damaged, and N/A answers
- The number of recorded photos
- Every damaged observation and its note
- Who recorded the inspection
Choose Edit to reopen the same per-device checklist. New answers replace that item’s current result, while the finished summary updates immediately after save.
Keep the evidence
Section titled “Keep the evidence”Recorded responses carry their own item labels, so changing or deleting a working template does not rewrite an older ticket. The Complete case record includes the intake condition states, damage notes, recorder and timestamp. Photo references remain attached to the ticket, and a kiosk customer acknowledgment is timestamped in that record when captured. The Chargeback response carries photos saved on the ticket; it does not include condition checklist answers.
This is most useful alongside check-in and kiosk and case files: intake records the condition once, then the ticket keeps it available for the bench and for any later dispute.
Practical checklist design
Section titled “Practical checklist design”- Require only the observations that truly must be verified before work begins.
- Put fast visual checks first, followed by functional tests and received accessories.
- Allow photos on damage-sensitive rows, not every row, so the action stays focused.
- Use concrete prompts such as “Screen condition (cracks / lines / dead spots)” instead of “Looks good?”.
- Test the checklist with a two-device ticket before rolling it out to the whole counter.