

Shipping setup overview
Este conteúdo não está disponível em sua língua ainda.
When devices arrive and leave by carrier, the Shipping section shows inbound and outbound shipments together, with each tracking number on its ticket.
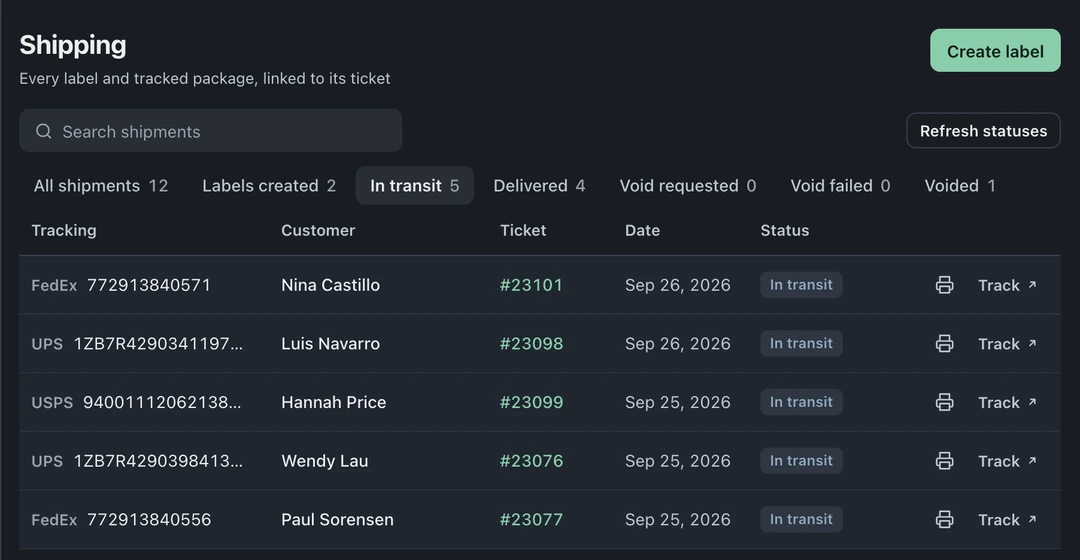
The shipping list
Section titled “The shipping list”Open Shipping in the left icon rail. Stage buttons at the top show counts for All shipments, Labels created, In transit, Delivered, Void requested, Void failed, and Voided. Select a button to filter the list.
Before creating a label
Section titled “Before creating a label”Shipping requires Business and a working Shippo or direct UPS connection. Configure the ship-from address and carrier access in Settings → Integrations & Shipping → Shipping. Review the recipient address, parcel size, weight, service, and price before buying a label.
Use the Shipping guide for the label and Shipping board steps.
New tracking comes from labels created in BenchKey. Manual tracking entry for labels bought elsewhere is not supported.
Tracking reaches the customer automatically
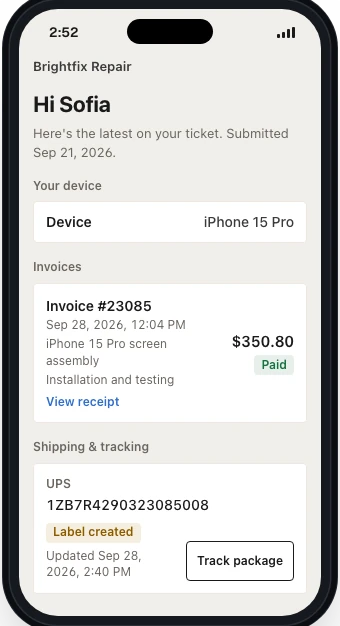
Section titled “Tracking reaches the customer automatically”Tracking attaches to the ticket, and return shipment tracking shows in the customer portal automatically. The customer can read the tracking number there without staff copying it into a message.
Built for mail-in work
Section titled “Built for mail-in work”Mail-in shops use this heavily, in both directions: the inbound shipment that brings the device to you and the outbound one that sends it home. See mail-in repairs for the rest of that workflow.