

Statuses & automations
Este conteúdo não está disponível em sua língua ainda.
A ticket’s status shows where the repair stands. Changing it can send configured customer messages and update the customer portal timeline.
The repair changes from In Progress to Ready for Pickup, then the shop's configured pickup text appears on the customer's phone. This recording uses fictional shop data in the real app.
Editing your statuses
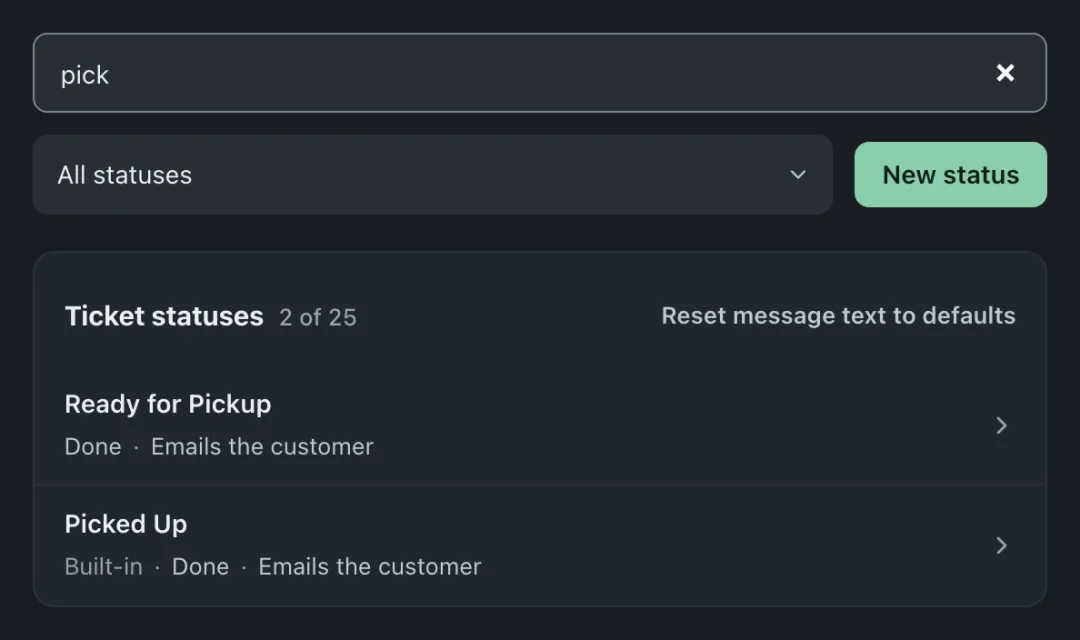
Section titled “Editing your statuses”Open Settings → Workflow → Statuses & Customer Messages. Your statuses should read like your shop’s actual workflow, for example:
- New
- In Diagnosis
- Pending Approval
- In Progress
- Ready for Pickup
- Picked Up
Owners and admins can add, rename and delete statuses and change their messages. Built-in statuses cannot be renamed or deleted, but you can change their messages. A status marked Managed by your brand keeps the name and group the brand sets. Keep the list short enough that everyone uses it the same way, a status nobody agrees on is worse than no status.
What a status can trigger
Section titled “What a status can trigger”Set up pickup messages, preview the email, and see the sending record on the ticket. (58 s)
Adding messages to a status needs Pro or Business. On Standard, you can still see every status message and use its switches. Built-in messages keep sending by email only, but your own messages show Paused on your plan and send nothing until you move to Pro. Texts need Pro or Business, a working texting connection and a permitted recipient.
Each configured status can trigger actions when a ticket enters it:
- Send an email, e.g., “your estimate is ready” when entering Pending Approval
- Send an SMS, e.g., “your repair is ready for pickup” when entering Ready for Pickup
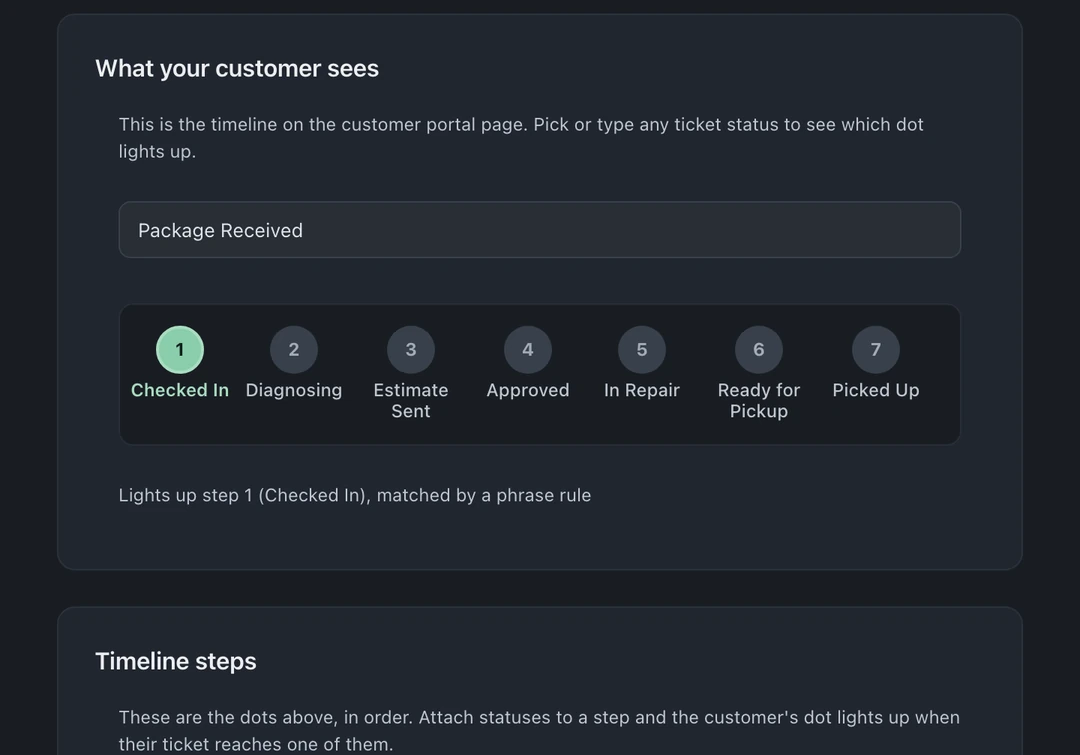
- Update the portal timeline, the customer-facing step that lights up
Templates support variables, customer name, device, ticket number, portal link, and are edited in the visual editor.
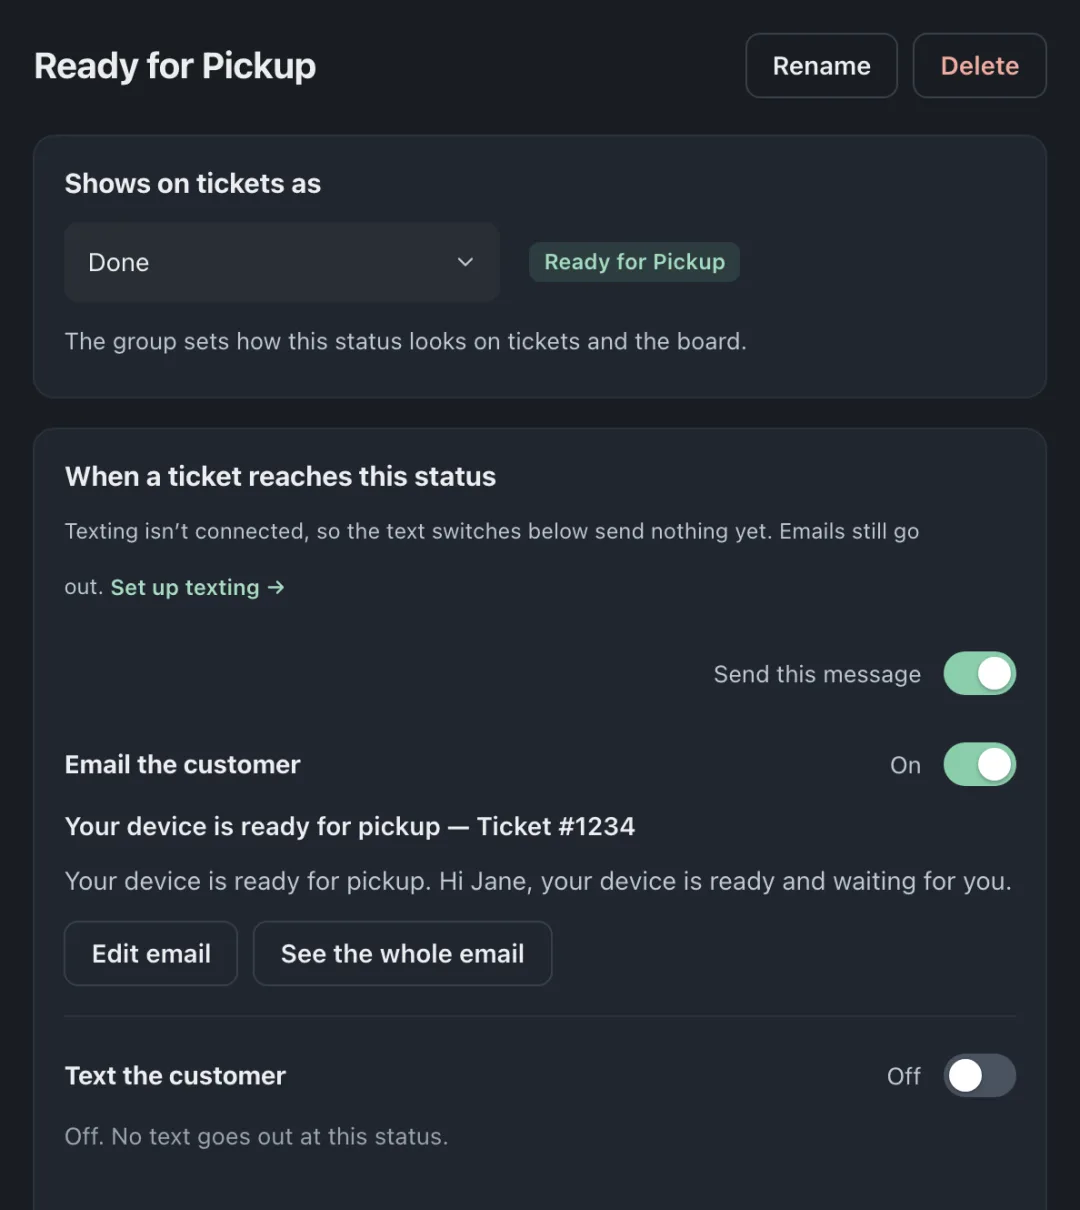
Each status row says what the customer gets under When a ticket gets here, such as Emails the customer or Sends nothing. Click a row to open that status’s page; All statuses takes you back. Use Message the customer or, if it already has messages, Add another message then Write a new message. You can also pick a message you already have from the list. Check Send this message and its Email the customer and Text the customer switches. A switched-on channel shows the words that go out, with Edit email (or See the whole email) and Edit text to change them. A new message starts switched on with ready-to-send words, so check them right away.
Automatic receipts
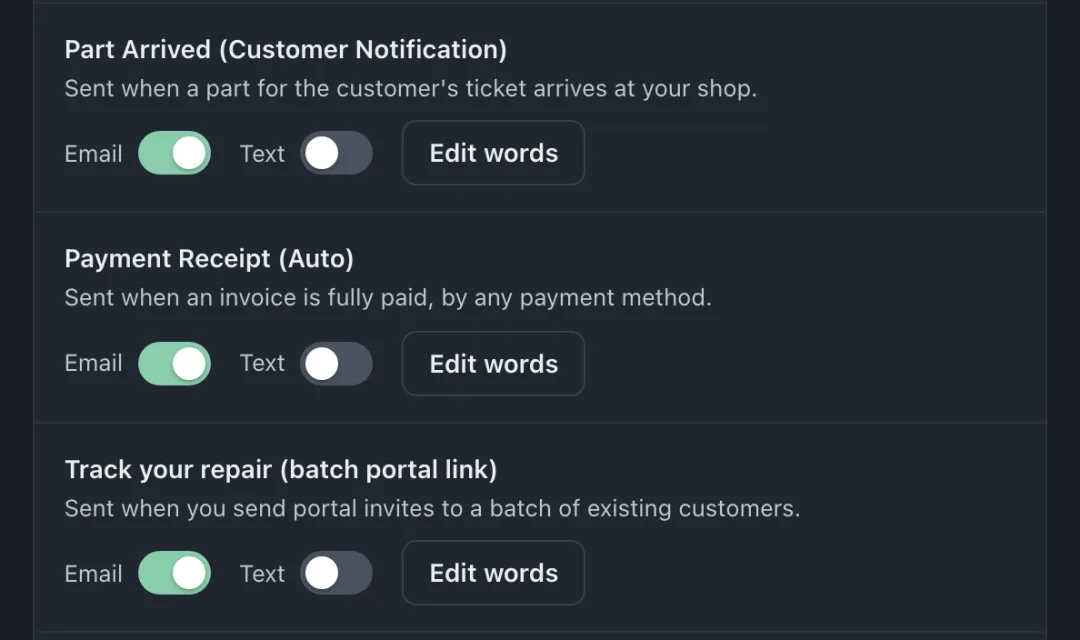
Section titled “Automatic receipts”Below the status list, open Messages on other events, find Payment Receipt (Auto), and use its Email and Text switches. Choose Edit words to check the message. A receipt goes out automatically once an invoice is paid in full, by any payment method. Partial payments and imported invoices do not send one automatically. Delivery depends on the recipient details, consent, and working channel connections.
Set it up by asking
Section titled “Set it up by asking”The fastest path is the AI assistant (owners and admins): “text customers when their repair is ready and email them when the estimate is ready.” It prepares the changes, including which status messages to switch on and what they say, and lists them. When it shows Apply, nothing is saved until you press it. Undo puts the change back.
The portal timeline mapping
Section titled “The portal timeline mapping”Customers don’t need to see every internal status. The portal timeline maps your statuses to customer-friendly steps, and you control that mapping per ticket type, walk-ins can have a short timeline, mail-ins a longer one that includes shipping stages.
Choose statuses your team uses
Section titled “Choose statuses your team uses”- Automate the high-anxiety gaps first: drop-off → diagnosis, and ready-for-pickup. These messages tell customers when diagnosis is underway and when their device is ready to collect.
- Review parts delays: use Waiting for Parts for repairs held up by a part, then check how old the open work is in Reports → Turnaround (Pro and Business; owners and admins by default).
- Let the automation be the discipline: if sending the estimate requires remembering, it won’t happen on busy days. Wire it to the status instead.