

Check-in & kiosk
Esta página aún no está disponible en tu idioma.
Check-in is how a walk-in becomes a ticket. Staff create the intake ticket in the main workspace, then the customer reviews and signs the agreement on a customer-facing kiosk.
The Device condition checklist opens after ticket creation, and the screen is marked Damaged with a note about visible cracks. This recording uses fictional shop data in the real app.
Staff-led walk-in
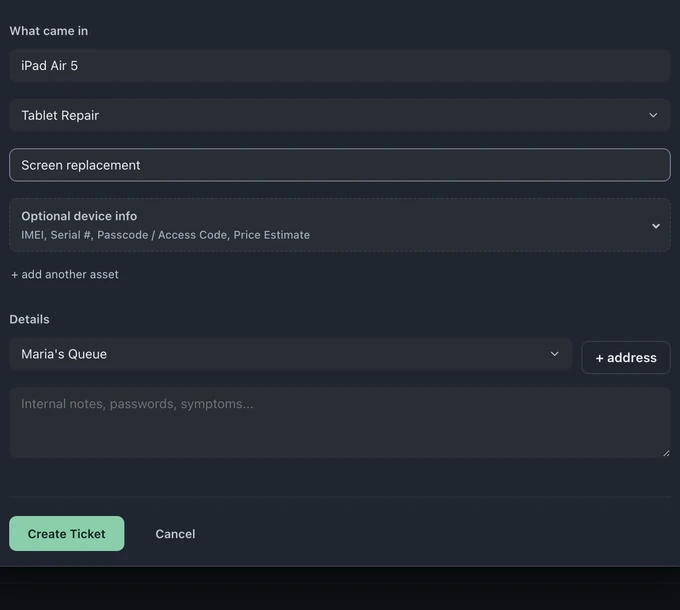
Section titled “Staff-led walk-in”On All tickets, choose New Ticket. You can also use Create new → New ticket from the + icon in the left rail. In the Check in dialog, choose Walk-in and complete the intake:
- Search for a returning customer or create a new contact
- Add one or several devices to the same drop-off
- Record the category, requested service, IMEI, serial, access code, and price estimate for each device
- Under Details, choose Assign to queue… and add internal notes. How did you find us? appears for new customers. The ticket uses the active store; for a different store, switch stores in the left rail before check-in
- Create the ticket and open it directly from the real queue
In Who’s it for, choose a Returning customer to fill in their details and see how many prior tickets they have. If a phone or email belongs to a customer with a different name, or matches two customers, Create Ticket asks whether it’s the same person before creating a customer.
When a Serial # or IMEI matches a device seen before, a note shows when it was last seen, its prior ticket count and its last issue. On Business, View previous history opens its full history.
The form builder
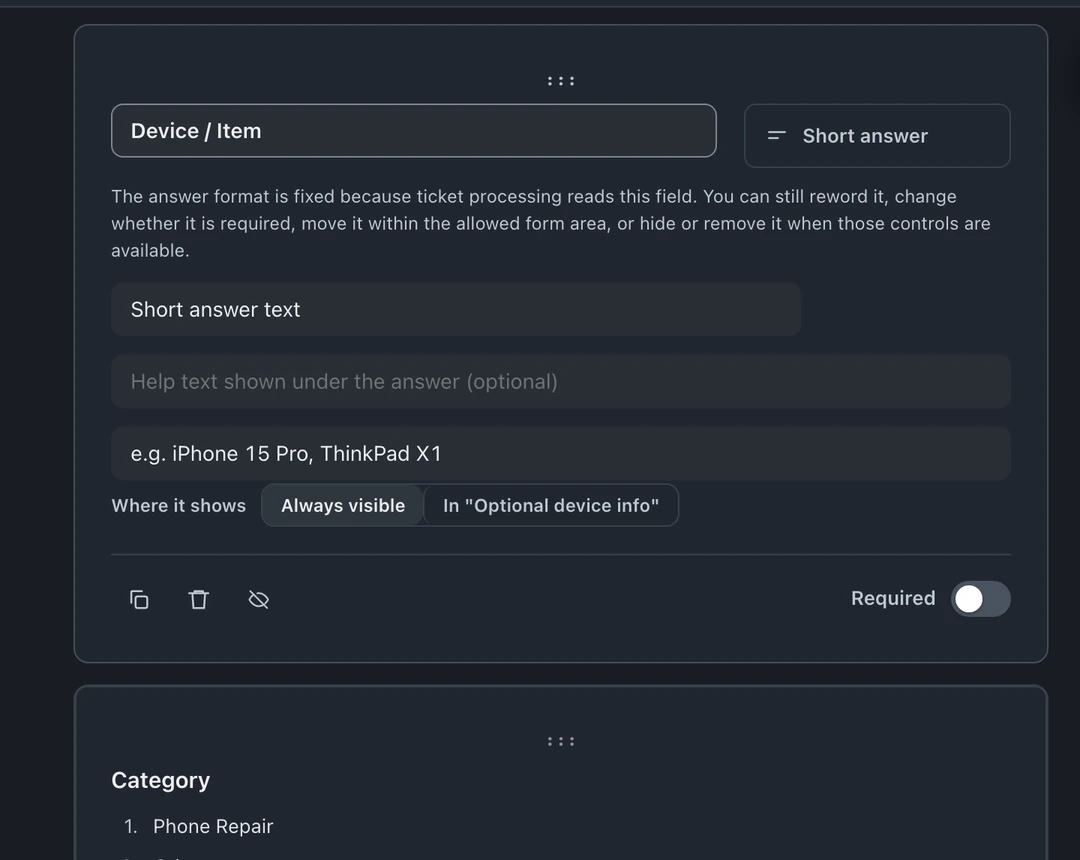
Section titled “The form builder”Owners and admins edit the check-in form in Settings → Check-In Form → Form Builder (Edit form), or from Edit form at the top of the Check in dialog. The check-in builder works like a form builder you own, add, remove, require, and reorder fields:
- Contact fields, name, phone, email (used for customer matching/dedupe)
- Device fields, what’s being dropped off, serial/identifiers
- The problem, in the customer’s own words
- Custom questions, chargers included, fuel level, whatever your counter needs. Passcode / Access Code and How did you find us? are already on the form.
- If you remove a standard question, Restore standard field at the top of the builder brings back How did you find us?, Device / Item, Category or Notes. Add a field under Optional device info brings back Serial #, IMEI, Passcode / Access Code or Price Estimate.
Changes go live immediately.
Kiosk mode
Section titled “Kiosk mode”Create a walk-in ticket, have the customer sign on the kiosk, and find the signed copy on the ticket. (1 min 12 s)
Find your shop’s private link under Private kiosk bookmark in Settings → Business → Terms → Kiosk agreement → Kiosk setup and display, and open it on the shop tablet. Owners and admins can also use Kiosk in the left menu when the kiosk is on. Open the kiosk on a customer-facing tablet or other screen with a browser. It displays an existing unsigned walk-in ticket so the customer can review and sign the agreement. Staff collect the contact and device details and create the ticket first. If you turn on Capture device condition at intake (Settings → Check-In Form → Condition Checklists) and staff record the checklist, the kiosk also shows the recorded condition for the customer to acknowledge.
What happens on submit
Section titled “What happens on submit”When staff submit the intake form:
- The customer record is found (matched by phone/email) or created
- Every device or asset keeps its own repair details and identifiers
- The ticket is created in the chosen store and queue with the complete intake
- Staff can choose ⋮ Ticket actions → Print Label on the ticket (Pro and Business). An enabled setting offers a drop-off receipt prompt after check-in
- By default, the customer gets the ticket-opened message by email if they have one on file, and by text when texting is set up. If Walk-in customer portal is on and they have an email on file, their portal link goes by email too. Texting the portal link is off by default (Settings → Business → Customer Portal → Walk-in portal). A customer with only a phone number gets no portal link by default; the Ticket Created card says so.
- Keep the form as short as honesty allows; every extra required field slows the rush.
- Use a custom field for anything you repeatedly forget to ask, that’s the form’s job now.
- Test the flow yourself monthly: walk in as a customer would, and feel where it drags.